Instructions
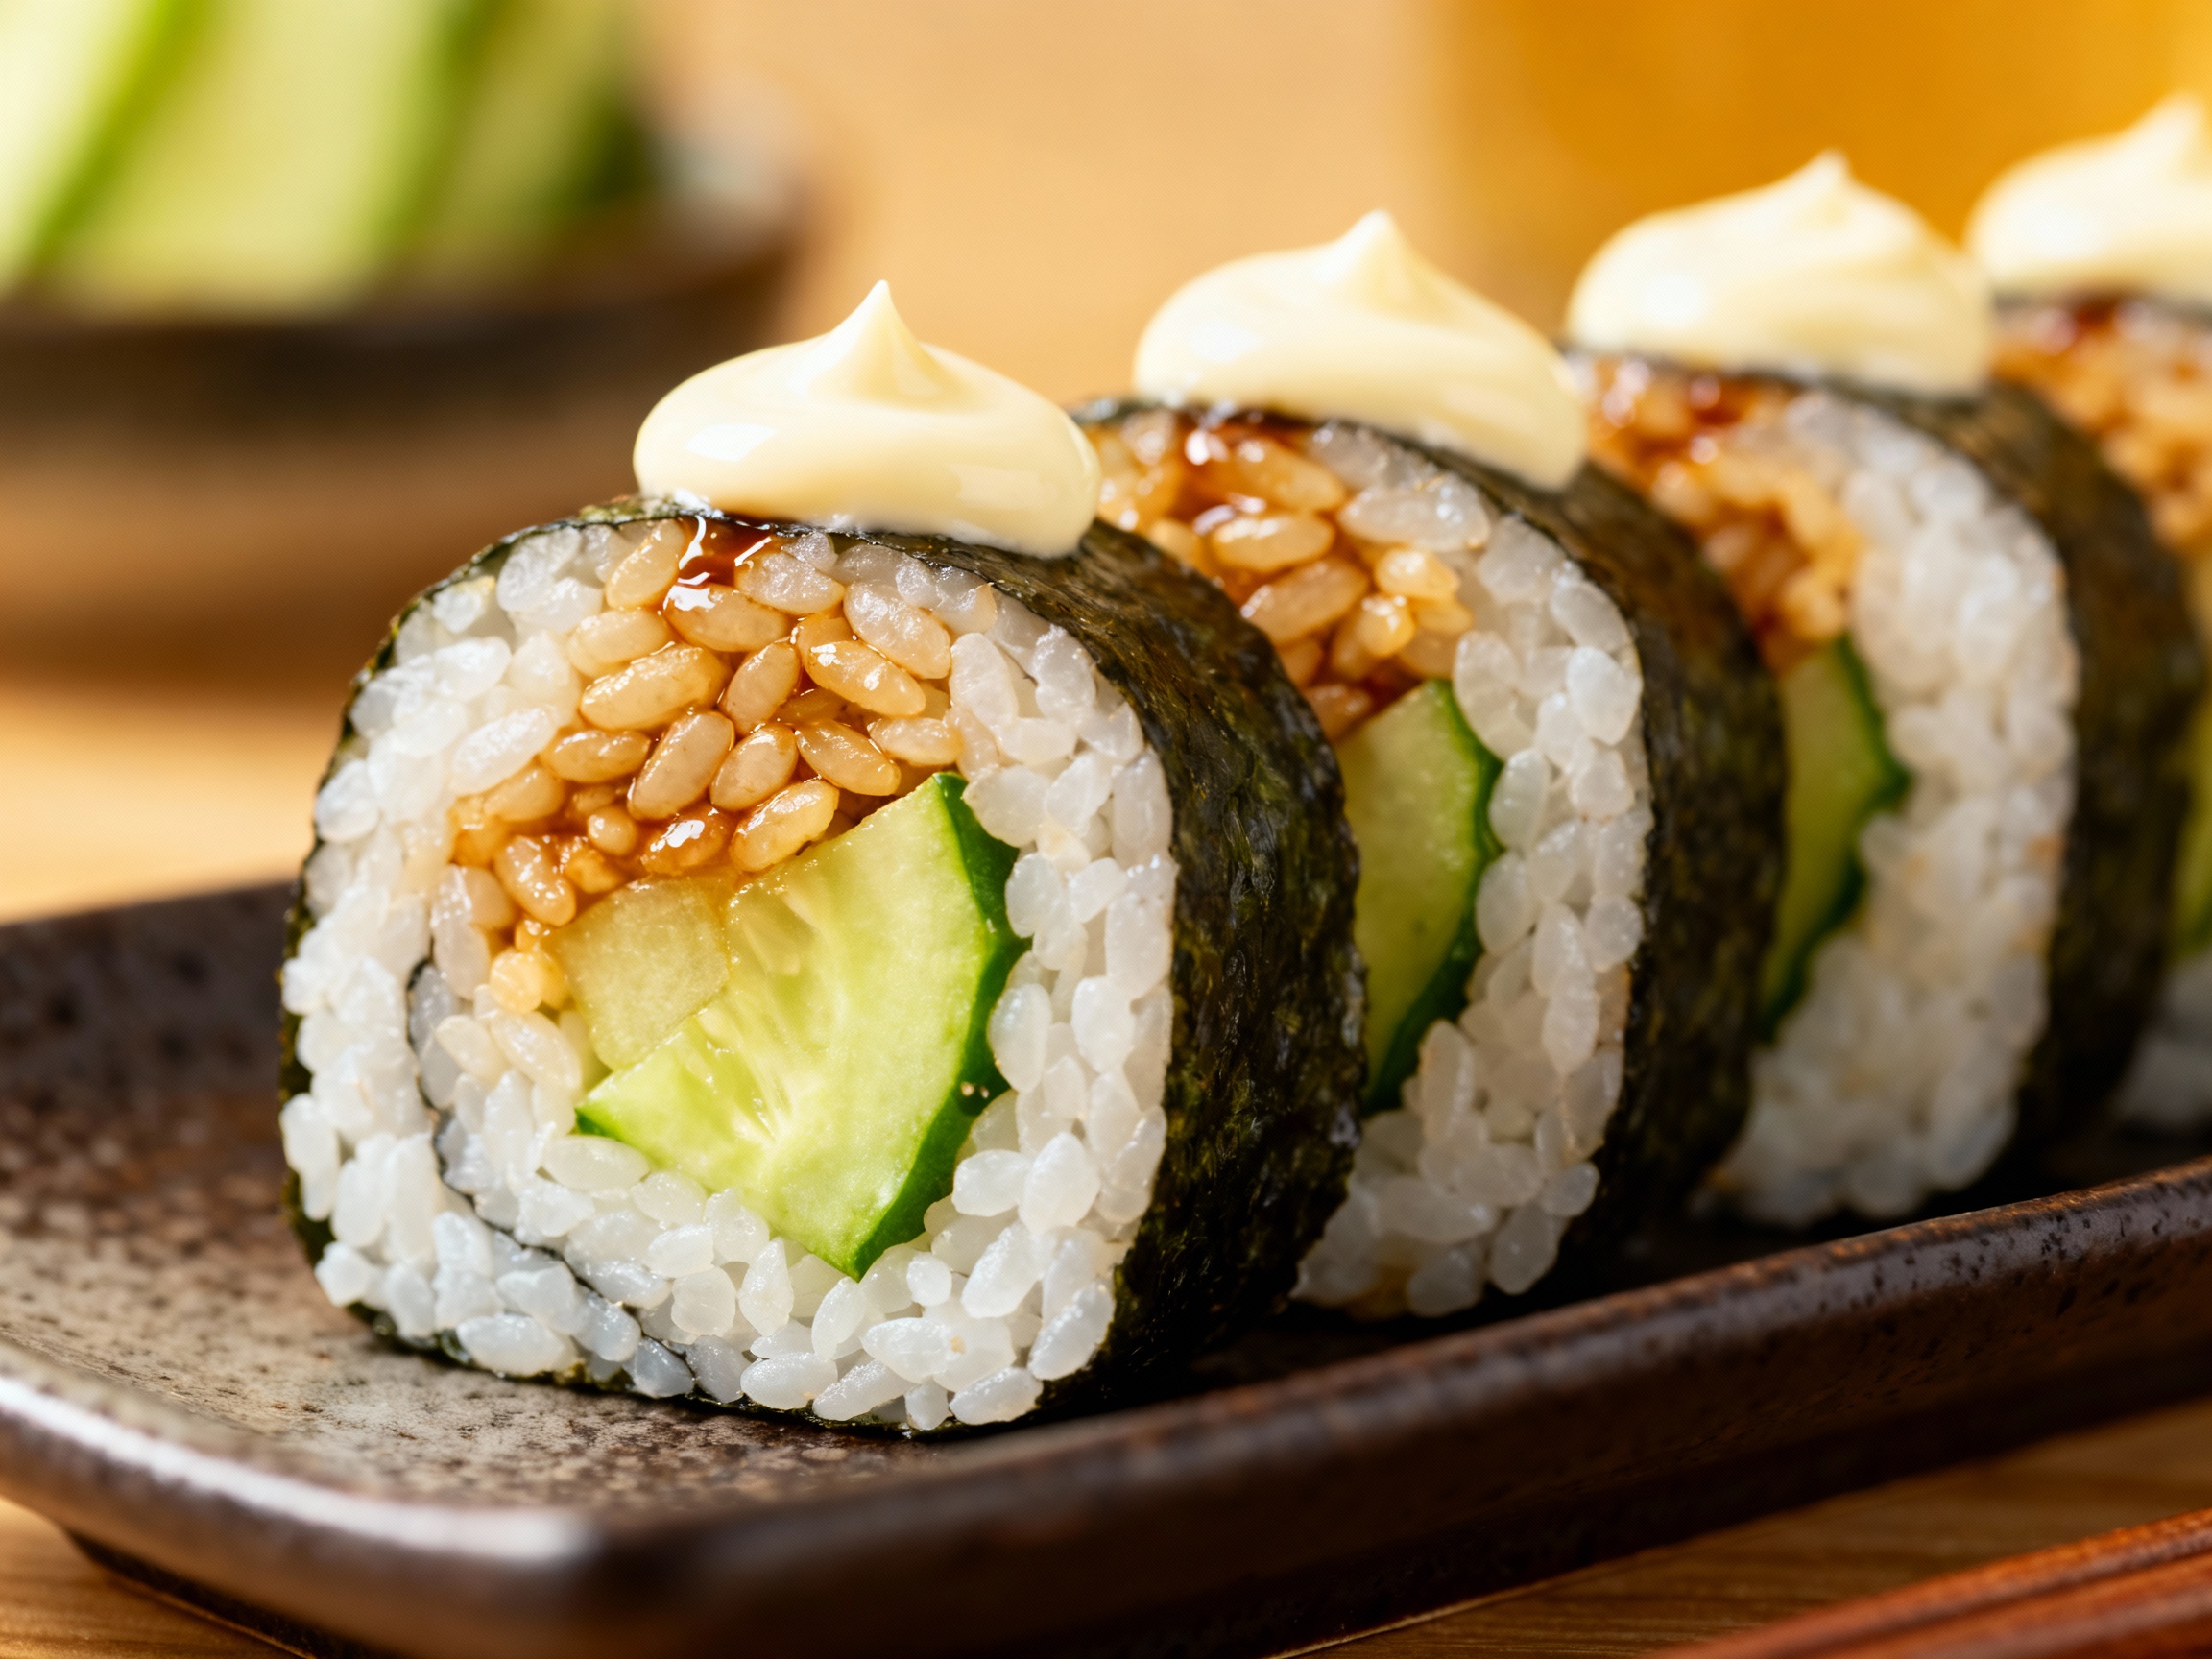
STEP 1 Begin by gently patting out the perfectly cooked sushi rice. Lay a nori sheet shiny-side down onto the bamboo mat, ensuring a smooth surface to work on. Dip your hands into the vinegared water—this prevents sticking—and carefully pat handfuls of rice evenly over the nori, aiming for about a 1cm thick layer, leaving the edge opposite you clear for sealing. STEP 2 Delicately spread a light, thin layer of Japanese mayonnaise down the center of the rice using a spoon. This creamy layer will complement the freshness of the fillings and add a subtle richness. STEP 3 Add your chosen fillings with care. Here, we recommend a line of tuna and crisp cucumber for a refreshing contrast. Encourage children to participate by placing their favorite fillings along the mayo-lined center. STEP 4 Begin rolling by gently lifting the edge of the bamboo mat closest to you over the fillings. Apply steady, gentle pressure to maintain a tight roll without squashing the ingredients. STEP 5 When you reach the rice-free edge of nori, lightly brush it with water—this acts like glue—to seal the roll securely. Continue rolling to form a neat, compact sushi roll. STEP 6 Remove the bamboo mat and wrap the sushi roll tightly in cling film. This helps hold the shape before slicing. Have an adult carefully cut the roll into thick, even slices. Unwrap the cling film and arrange the sushi slices on a serving plate. STEP 7 For pressed sushi, begin by lining a loaf tin with cling film to prevent sticking. Arrange a thin layer of smoked salmon evenly on the cling film inside the tin, which will serve as a flavorful base. STEP 8 Spread approximately 3cm of sushi rice evenly over the salmon. Fold the cling film over the rice and press down firmly, using your hands or another tin, to compress the layers together into a solid block. STEP 9 Carefully invert the block onto a chopping board like a sandcastle, then have an adult cut the sushi block into finger-sized pieces. Remove the cling film before serving. STEP 10 To make sushi balls, start by placing a small square of cling film and laying a topping—for example, half a prawn or a small piece of smoked salmon—on it. With damp hands to prevent sticking, roll walnut-sized balls of sushi rice and place each onto the topping. STEP 11 Gather the corners of the cling film and twist tightly to shape the sushi balls, compacting the rice around the topping firmly. Unwrap the cling film carefully and present these cute bites on a serving dish for guests to enjoy. *Tips:* Keeping your hands damp while handling sushi rice minimizes sticking and helps achieve smooth textures. Be patient when rolling and pressing to maintain the beautiful shape and consistency sushi is known for. Experiment with different fillings and toppings to tailor the experience to your taste!